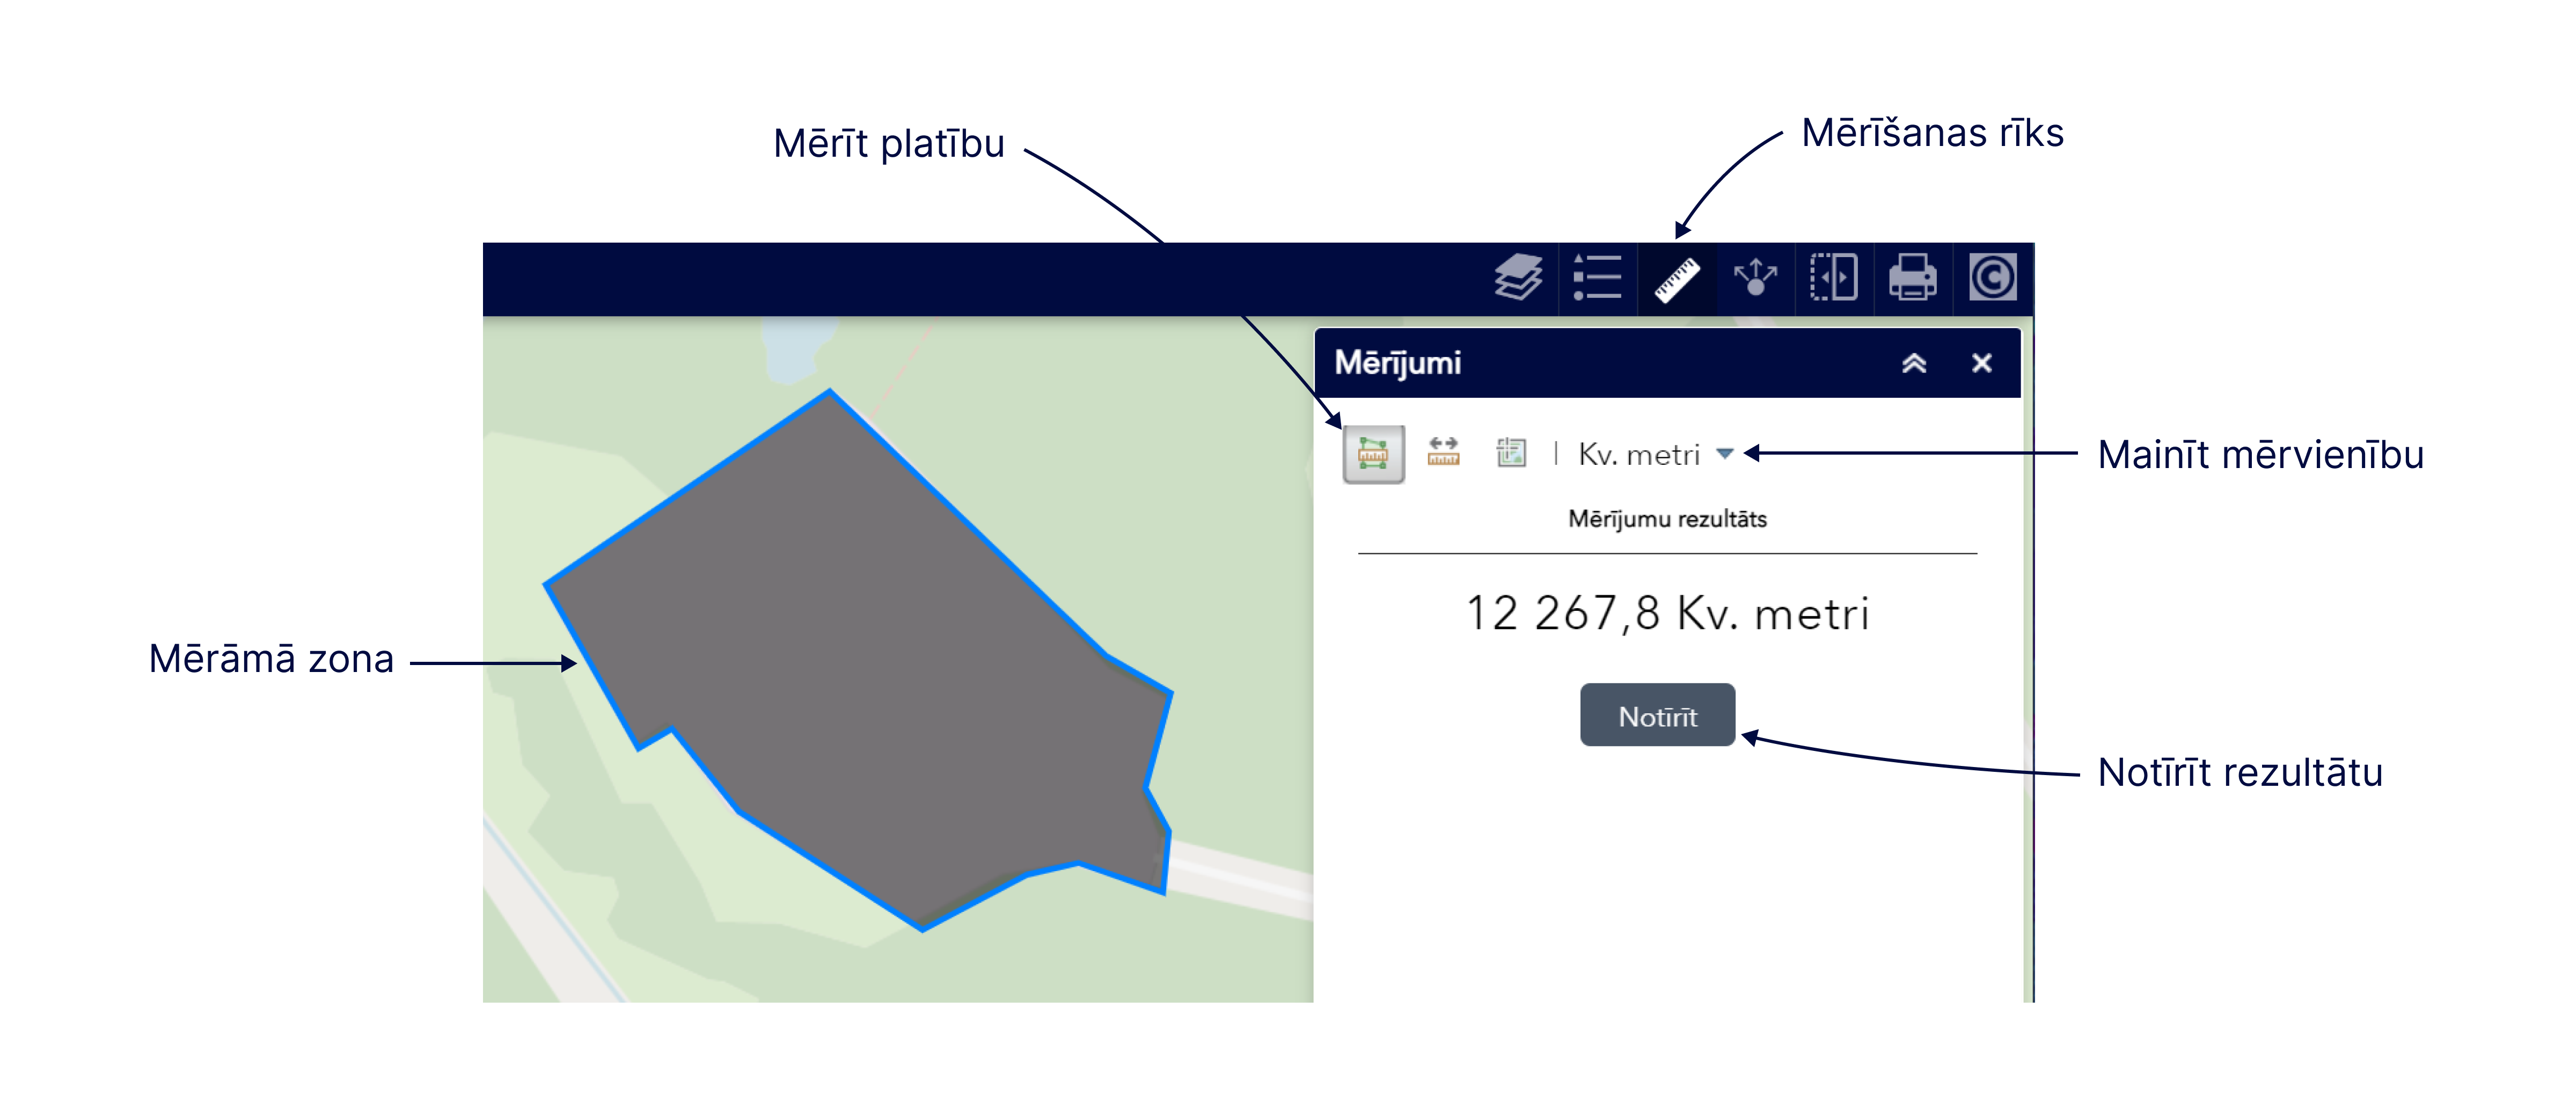
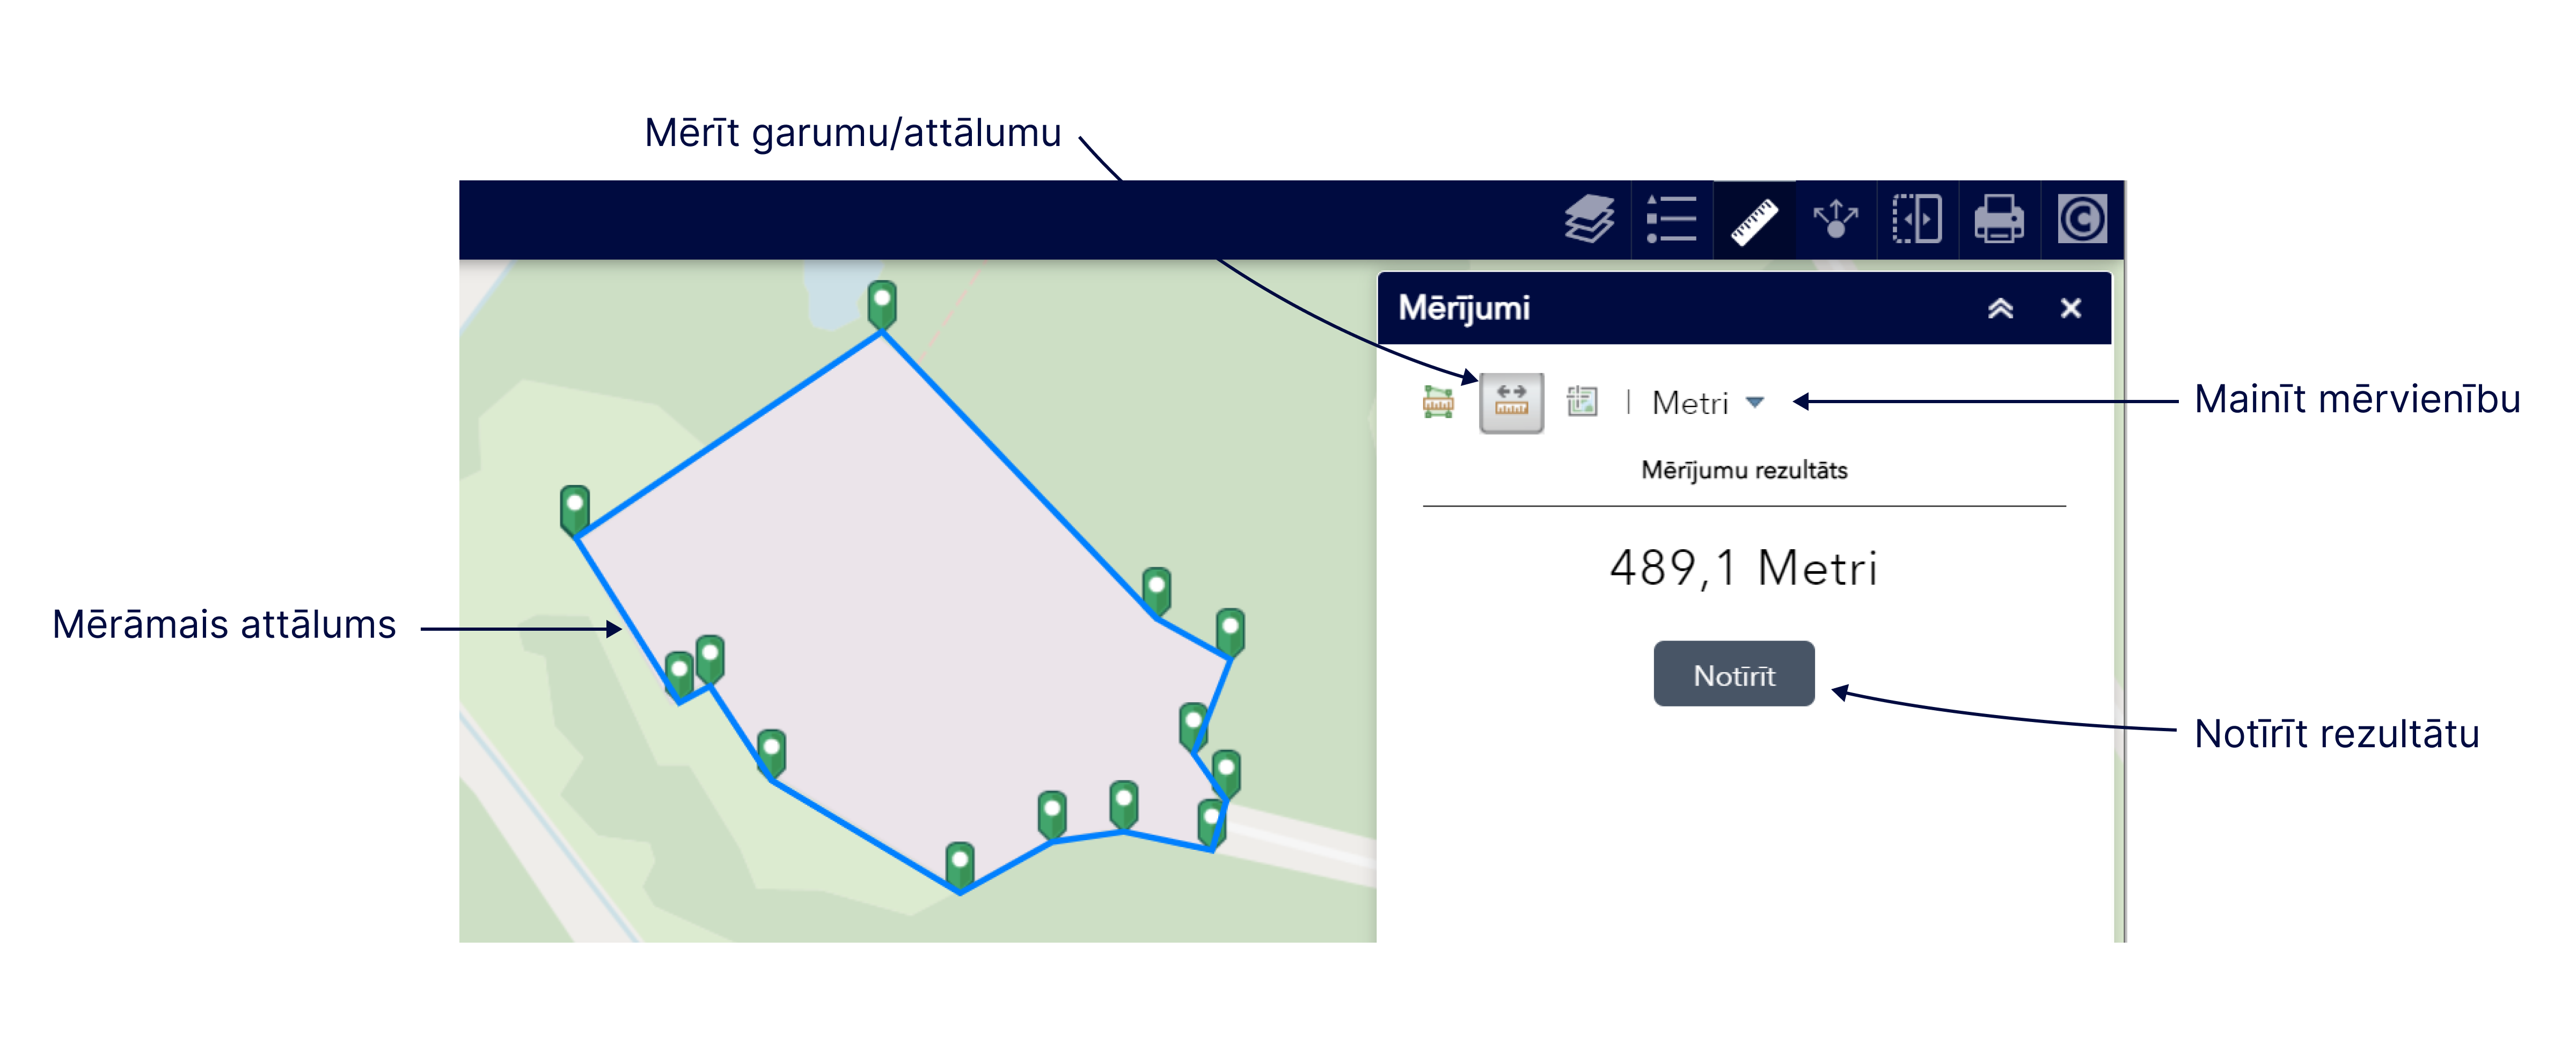
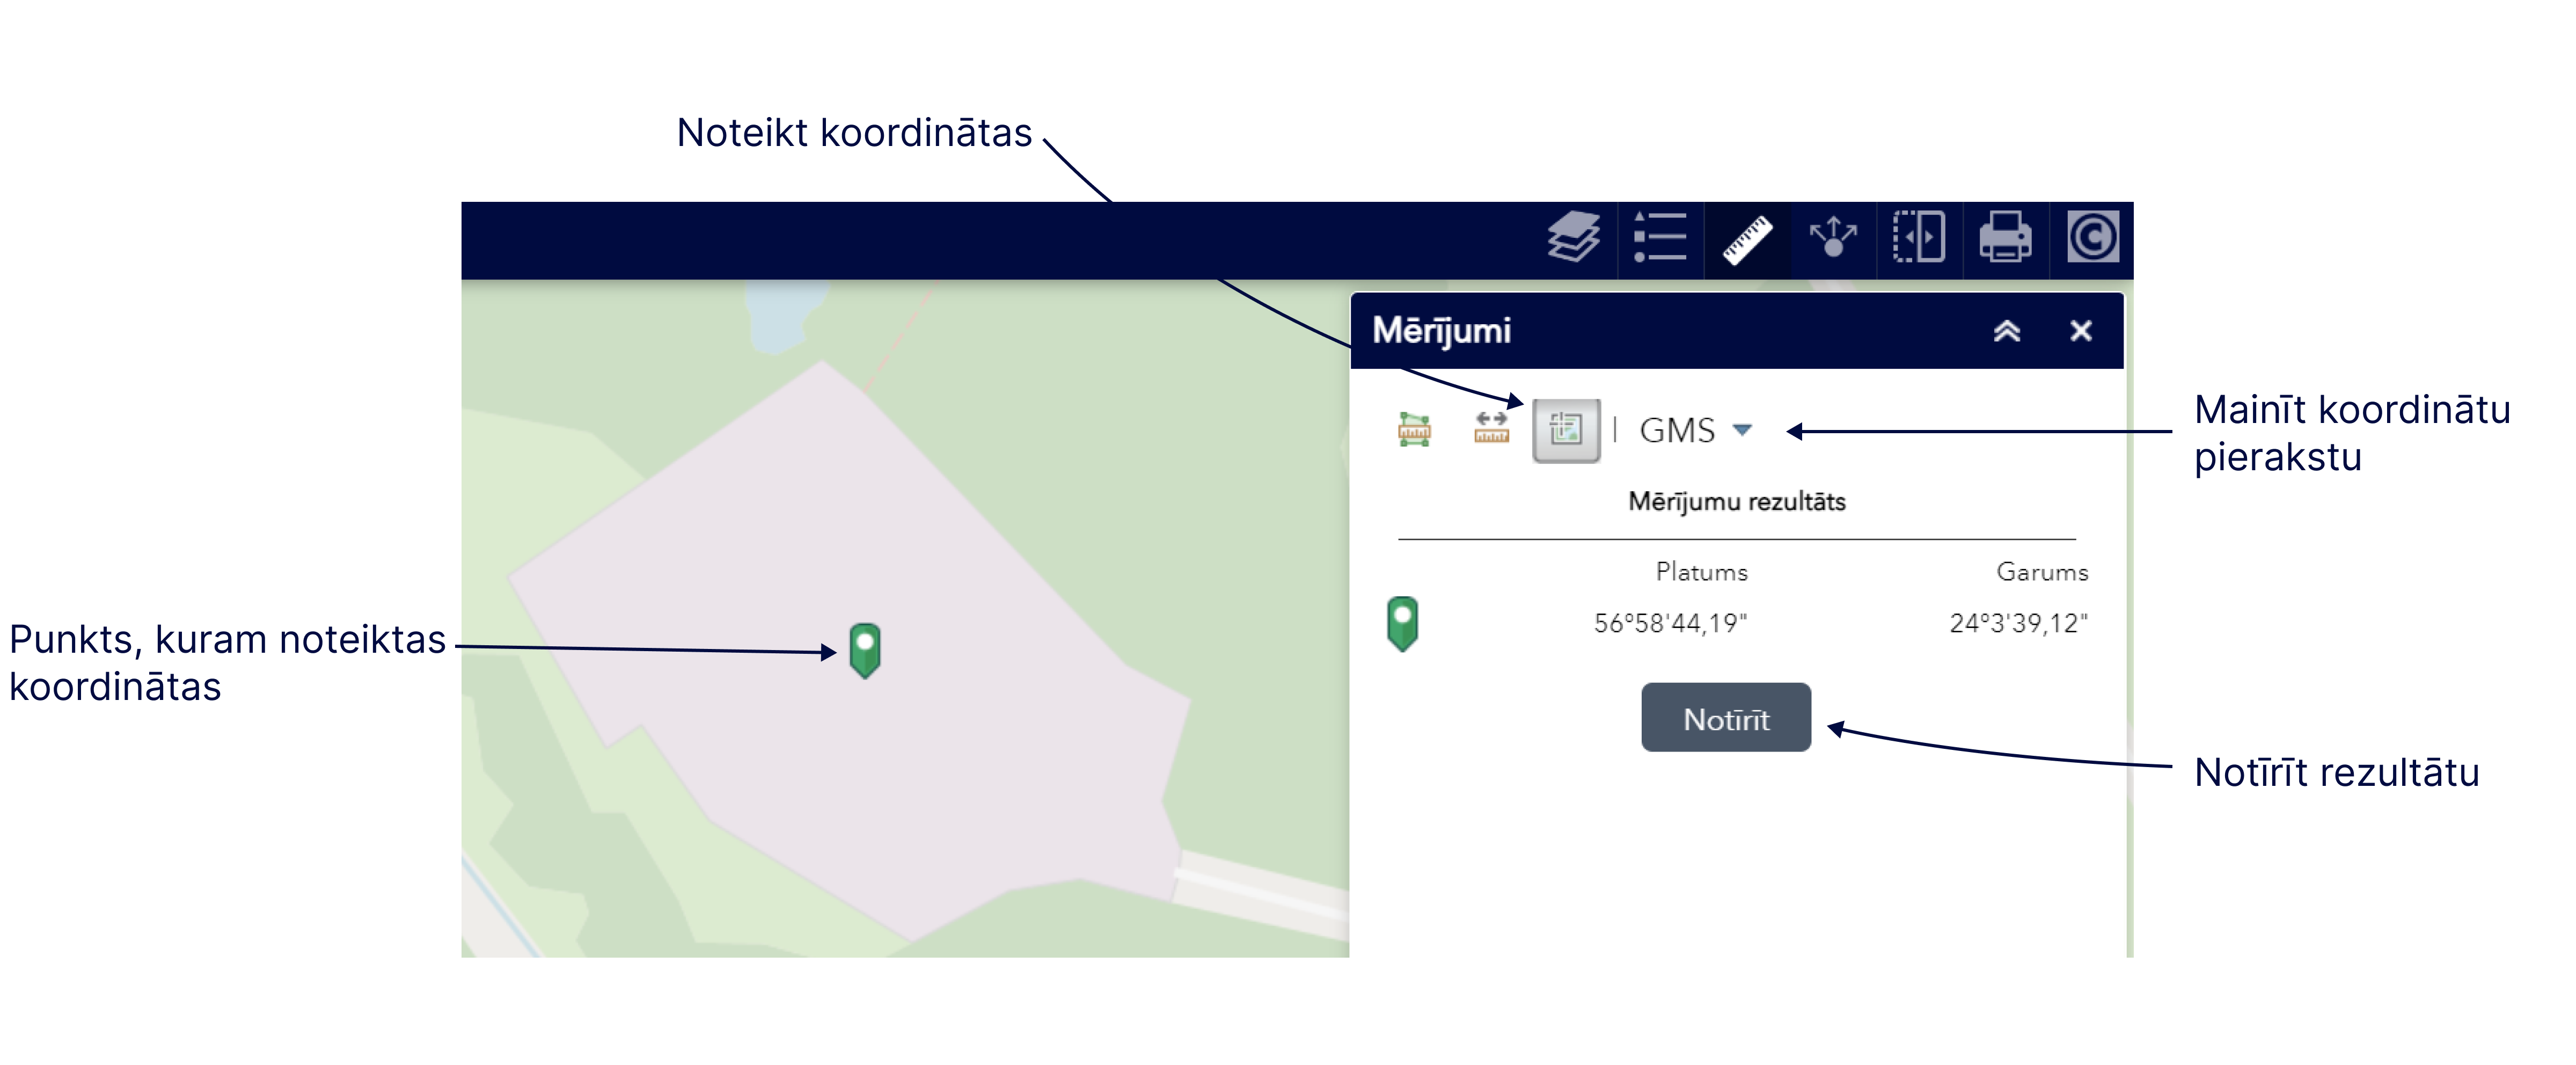
The Measurement tool, the third tool in the row of specific tools at the top right of each thematic map, allows the user to make simple and convenient measurements using three different measurement methods.
Please note!
- A menu of measurement units is located to the right of the measurement function buttons, where, after enabling a particular method, it is possible to specify the measurement unit to be used for measuring
- If you press the CTRL key on the keyboard while measuring and hold it, it is possible to touch a specific map element from the published data layers to obtain a more accurate measurement result.
- It is not possible to save and print the results of these measurements using the default printing tool of GEO RĪGA.
Measure the area – to measure the area, the function must be enabled by pressing the button of the tool. After that, by clicking the map and sequentially placing points, you should indicate the area of interest so that a polygon is formed. The measurement is finished with a double click. The marked area on the map will be highlighted, and the result of the measurement will appear in the toolbar next to the Measurements Result.

Measure the distance – to measure a distance/length, by pressing the tool button, the function must be enabled and the section or sections whose length needs to be determined must be indicated on the map. The measurement is finished with a double click. The marked multi-line will stand out on the map and the measured distance value in the selected measurement unit will appear in the toolbar next to the Measurements Result.

Location, namely, set the coordinates. By clicking the tool button, you need to enable the coordinate determination feature, and by clicking the map, you must indicate a point or object whose coordinates should be determined. The marked place (placemark) will stand out on the map and the geographic coordinates in the selected measurement unit will appear in the toolbar next to the Measurements Result.

