An Attribute table is a database or tabular file that contains information about a set of geographic features, usually organised so that each row represents a feature and each column represents one attribute of the feature. Geographic information system attribute tables are often connected or linked to spatial data layers, and the attribute values they contain can be used to analyse the data and make data-driven decisions.
A significant advantage of the attribute tables is the option to quickly analyse large data sets, selecting objects by their characteristics or compliance with the set criteria and spatially visualising the obtained result.
Please note! When working with the attribute table, we recommend selecting only data layers necessary for information analysis and turn off redundant layers. This will improve data loading and overall speed of the GEO RĪGA portal.
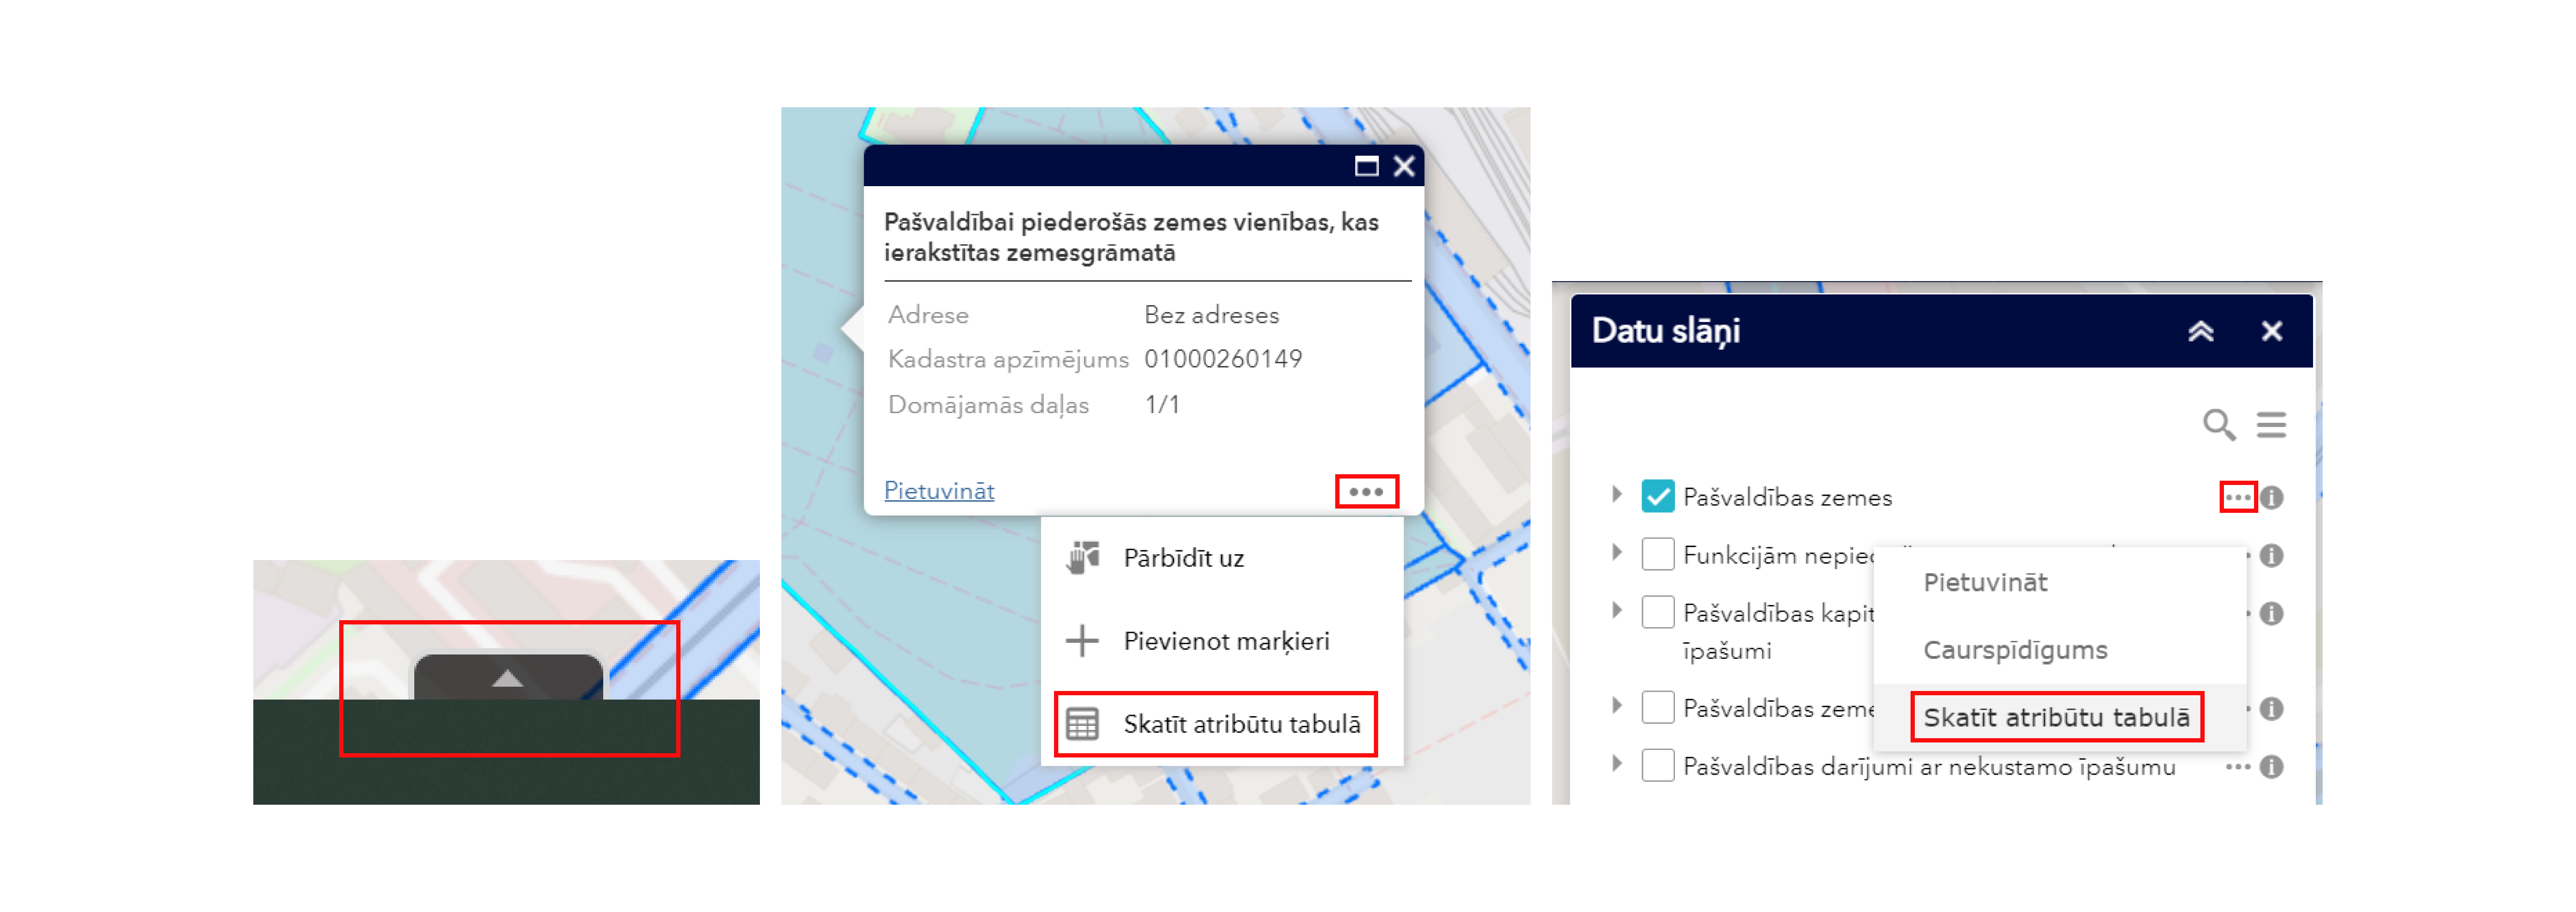
Three ways to expand the attribute table of data layers:
- By clicking the icon at the bottom of the map, you can view the attributes of the active data layers and their objects on the map;
- By clicking the three dots in the pop-up window and selecting the “View in Attribute Table” option;
- By clicking the three dots next to the layer name in the data layers widget and selecting the “View in Attribute Table” option.
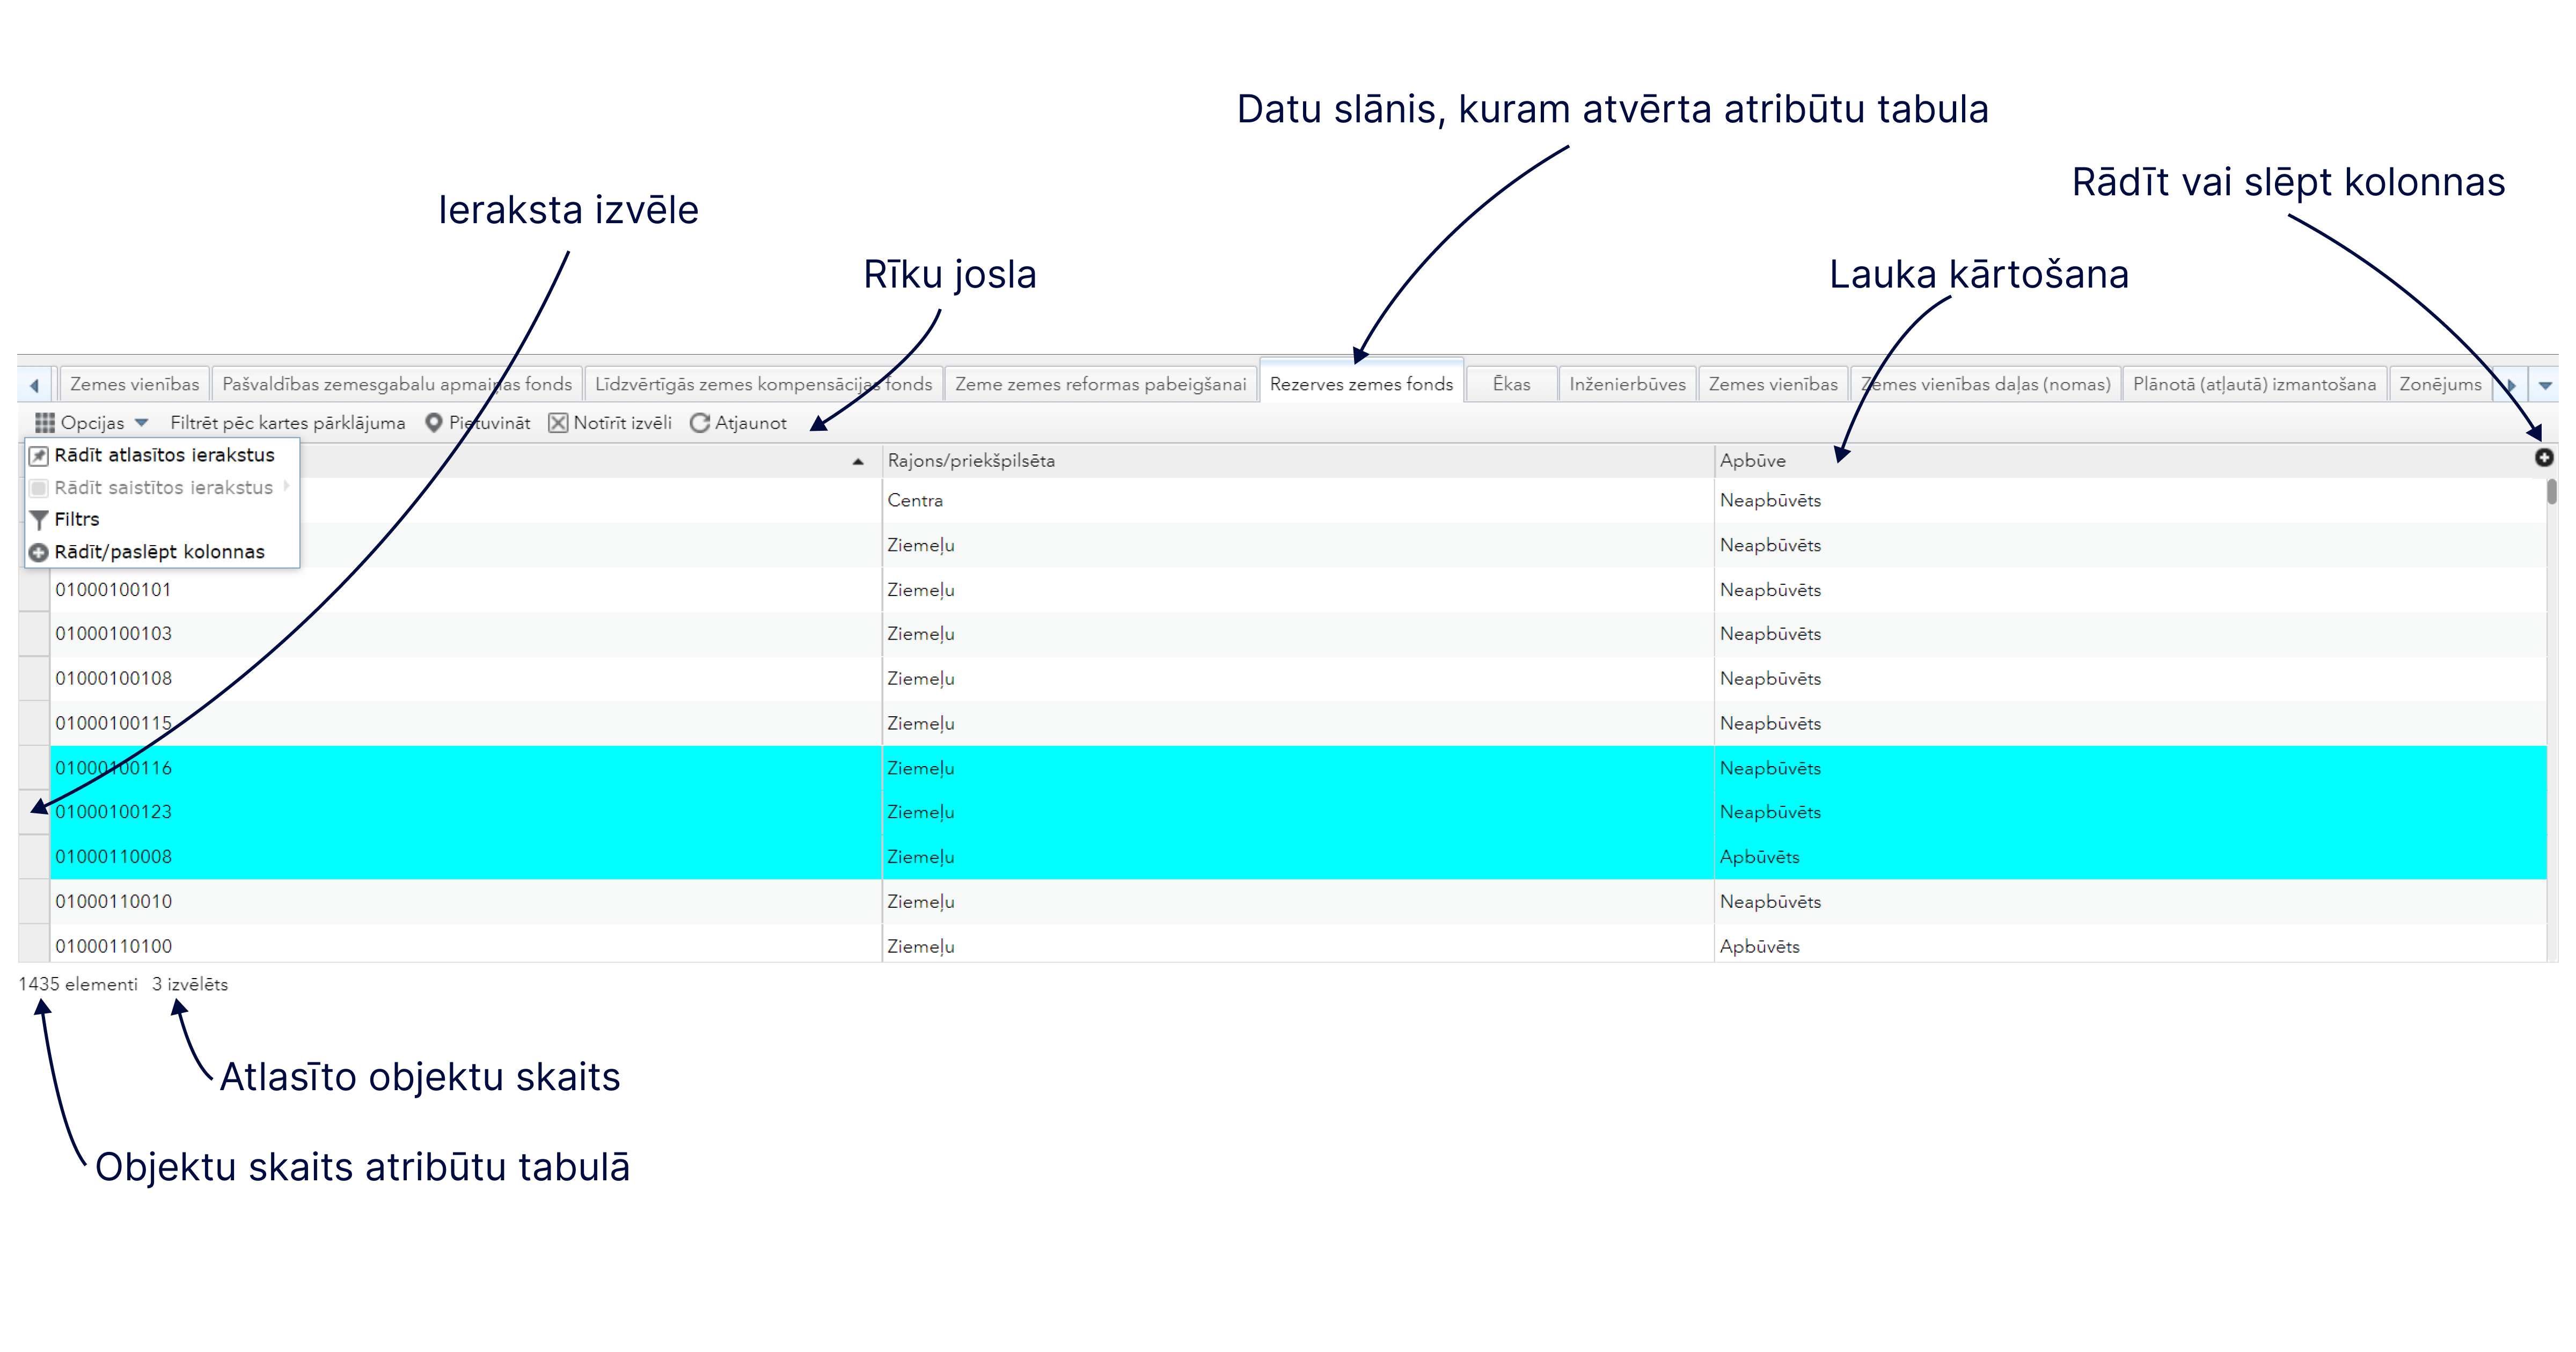
The functions to be used to work with the attribute table are described below.
- Selection of entries – click one or more entries in the table to select them. The selected objects on the map will appear light blue. Double-clicking a field in the selected entry zooms into it on the map. Press and hold the Shift or Ctrl key to select multiple entries.
- Clear selection – click the Clear Selection button to clear all selected objects.
- Zoom in – click Zoom in to reset the map scale to centre around the selected objects.
- Refresh – click Refresh to refresh the table.
- Sort field – click a field header to sort entries by that field in ascending or descending order.
- Show or hide columns – click the plus sign button to the right of the attribute table to open the field visibility window. Check or uncheck fields to make them visible or invisible in the table.
- Filter by map coverage – displays object attributes within the extent of the map displayed on the device screen. Activate this function to display only the objects in the attribute table that are visible in the map view. To disable this option and see all the objects in the data layer, repeatedly press the same function button.
- Options:
- Show selected entries – displays the selected entries.
- Show related entries – shows related entries if the selected entry has a related table.
- Filter – filters table entries using expressions given by the user, taking into account the attribute information available in the attribute table.
- Show or hide columns – equivalent to clicking the plus sign button on the right side of the panel to set the visibility of individual fields.
Data selection example:
The video demo shows how the thematic map Municipal Properties selects objects of interest from 3 data layers by adding expressions specifying that only those objects that meet the defined criteria will be selected.
Selection criteria:
- Select the land units in the fifth cadastral group
- From the chosen land units, select the land units belonging to the municipality and recorded in the land register.
- Select those municipal land units necessary for the functions of the environmental sector.
- From the selected land units, identify those whose area is less than 1500 m².