Clicking the tool button Data layers, which is the first in the row of specific tools on the top right of each thematic map, expands the list of data layers published in that particular thematic map.
Please note! By default, the list of data layers is usually already expanded.
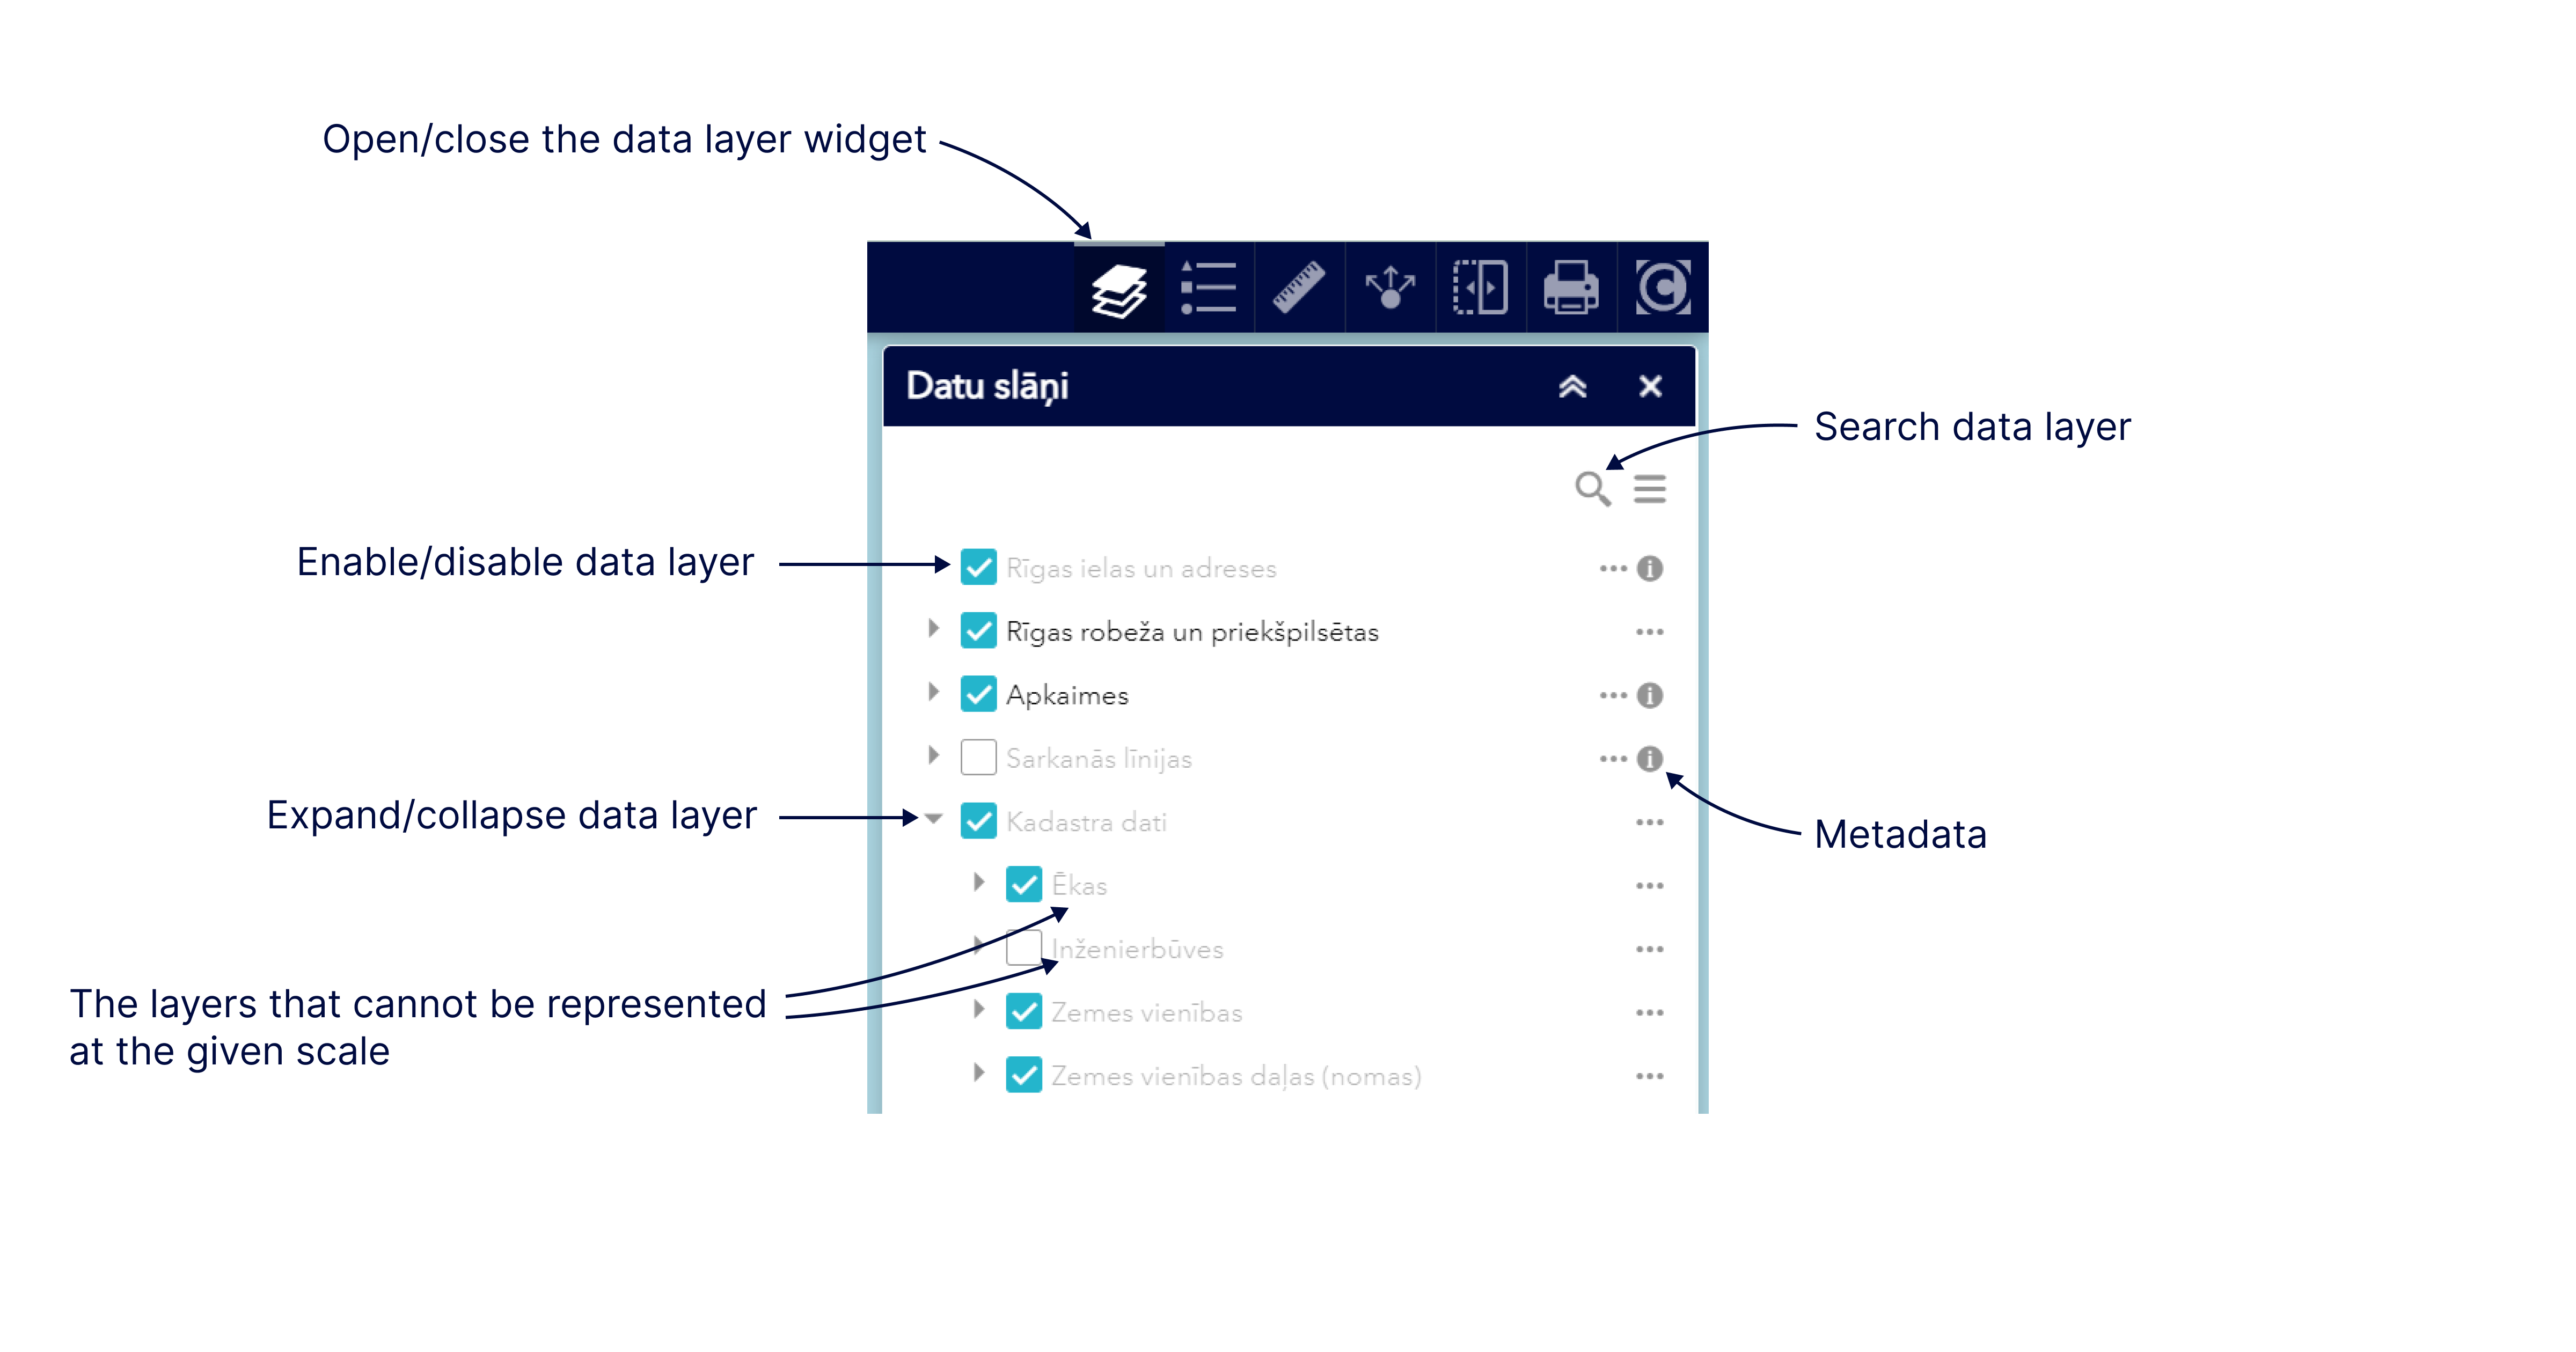
To enable a data layer, you need to click the box to the left of the data layer name – a checkmark appears in the box and it turns blue. To disable the data layer, remove the checkmark from the box by clicking the box.
Black text indicates the data layers that can be enabled and will be displayed at the respective map scale. Data layers not visualised at the given scale are shown in grey. Zooming in or out of the map also changes the data layers displayed in the corresponding zoom.
The arrow on the left side of the data layer name before the checkbox indicates that the specific data layer has available sub-layers – additional data sets that can be enabled or disabled as needed. You can expand the sub-layers by clicking the arrow.
Please note! Each thematic map already has individual data layers expanded by default, thus providing an initial idea of the available data. Certain data layers can be divided into three sub-levels.
To the right of the data layer name, under the three consecutive dots, there may be a tool whereby you can take additional actions with the specific data layer, for example, zoom in if the data is not displayed at the current scale, set transparency or go to the attribute table, where you can see additional information about the data.
If there is a button with the letter “i”on the right side of the data layer, when you click it, a description of the specific data set, or metadata, opens in a new window.
Please note! For more convenient management of data layers, the tool also includes functions to work with all data layers simultaneously. The function buttons are located on the upper right side of the tool above the list of data layers.
Clicking the search button with the magnifying glass and typing a keyword in the entry field will search for data layers that include the specific word in the name or metadata keywords. For example, typing the word “grausts” (“derelict building”) will find and point to the “Vidi degradējošās būves” (“Environmentally degrading structures”) data layer because the word “grausts” is included in the metadata keyword list of the data set.
Clicking the button with the three horizontal stripes gives you four choices:
- Turn on all data layers, which means that all data layers published in the given app will be enabled and displayed in map view – loading of more data layers takes longer and, accordingly, working with the map may be slower;
- Turn off all data layers means that all active data layers will be disabled and the data will not be visible in the map view;
- Expand all data layers means that all data layers are expanded to the last sub-layer;
- Collapse all data layers means that all expanded data layers are collapsed to the first data layer, that is, only the first level names of the data layers are visible in the layer list even if a data layer should already have been expanded by default.